Running on a cluster
You have now used metawards to perform one model run for several
different combinations of the beta and too_ill_to_move
disease parameters for your model of the lurgy.
It is important to repeat each model run several times in order to reduce random error and interpret the change in the population trajectory in response to changes in disease parameters.
This is supported using the --repeats command line argument. You
can use this to specify the number of times you want to repeat each
model run, e.g. --repeats 8 would repeat each model run
eight times.
Note
You can pass multiple values to --repeats if you want different
adjustable variable sets to be repeated different numbers of times.
Equally, you can add a repeats column to the lurgyparams.csv
file that gives the number of times each line should be repeated.
If you use both options, then the repeats are multipled, e.g. if
repeats is 2 in the model file, and --repeats 3 is passed
as a command-line argument, then the adjustable variables on that
line of the model file will be repeated 2 x 3 == 6 times.
To this end, metawards natively supports running across multiple
compute nodes of a
slurm or
PBS-style
High Performance Computing (HPC) cluster.
Installing on a cluster
The first thing to do is to get metawards installed on your cluster.
A good option is to use a Python environment, as this should help make
it easier to return to a previous metawards installation if you
need to repeat a job.
Take a look here to learn
how to install metawards into a Python environment.
Setting up the job
Next, create a directory for your cluster job, and into this copy your
lurgy2.json file. You could also copy your lurgyparams.csv file,
but we will take the opportunity of running on a cluster to run a more
fine-grained parameter sweep. Rather than write the lurgyparams.csv
file by hand, we will write now a simple script that can generate it
for us.
Create a file called create_params.py and copy in the below;
import sys

b0 = float(sys.argv[1])
b1 = float(sys.argv[2])
bdel = float(sys.argv[3])

i0 = float(sys.argv[4])
i1 = float(sys.argv[5])
idel =float(sys.argv[6])

print("beta[2]  too_ill_to_move[2]")

b = b0
while b <= b1:
    i = i0
    while i <= i1:
        print("  %.2f     %.2f" % (b, i))
        i += idel
    b += bdel
Run this script using;
python create_params.py 0.3 0.71 0.05 0.0 0.5 0.05 > lurgyparams.csv
This will create lurgyparams.csv that describes 99 model runs. These
will vary beta between 0.3 to 0.7 inclusive, in steps of 0.05, while
also varying too_ill_to_move between 0.0 to 0.5 inclusive, also
in steps of 0.05. The first few lines of this file are shown below;
beta[2]  too_ill_to_move[2]
  0.30     0.00
  0.30     0.05
  0.30     0.10
  0.30     0.15
  0.30     0.20
  0.30     0.25
  0.30     0.30
  0.30     0.35
  0.30     0.40
Writing a job script
We now need to write a job script that will submit a run the job to the cluster queueing system. Example job scripts for SLURM and PBS are here.
I am running on the Catalyst ARM64 cluster,
which uses PBS. The metawards command I need is very similar to before,
but now I am going to run 16 repeats, use 8 cores per model run, and
will force the overwriting of output to make sure that my jobs don’t
hang on a prompt. The job-script I used, which I called jobscript.sh,
is copied here;
#!/bin/bash
#PBS -l walltime=12:00:00
#PBS -l select=4:ncpus=64:mem=64GB

# source the version of metawards we want to use
source $HOME/envs/metawards-devel/bin/activate

# change into the directory from which this job was submitted
cd $PBS_O_WORKDIR

export METAWARDS_CORES_PER_NODE="64"
export METAWARDSDATA="$HOME/GitHub/MetaWardsData"

metawards --additional ExtraSeedsLondon.dat \
          --disease lurgy2.json \
          --input lurgyparams.csv --repeats 16 --nthreads 8 \
          --force-overwrite-output
The PBS commands at the top tell the queueing system that I want to run
for a maximum of 12 hours using four 64-core nodes (256 cores in total).
I’ve then activated my metawards-devel python environment that was in
$HOME/envs/metawards-devel.
To help distribute work, metawards needs to know how many cores there
are on each compute nodes. This is set using the
METAWARDS_CORES_PER_NODE environment variable (or alternatively could
be passed using the --cores-per-node command-line argument).
I’ve also used the METAWARDSDATA environment variable to locate
the MetaWardsData repository data.
You may have to modify this script for your cluster and queueing system.
Running the HPC job
Once you have written the job script, you should submit it using your job submission command. As I used a PBS cluster, I used;
qsub jobscript.sh
I could then check the status of the job using
qstat -n
Processing the output
The job will take a while. 99 model runs with 16 repeats each is 1584 total runs, so you may want to go to lunch or leave this running overnight.
In my case, the job took 2 hours in total to run. Once complete, the
results.csv.bz2 file contains all of the population trajectories
and can be analysed in an identical way as before. If you want, you can
my results.csv.bz2 file here.
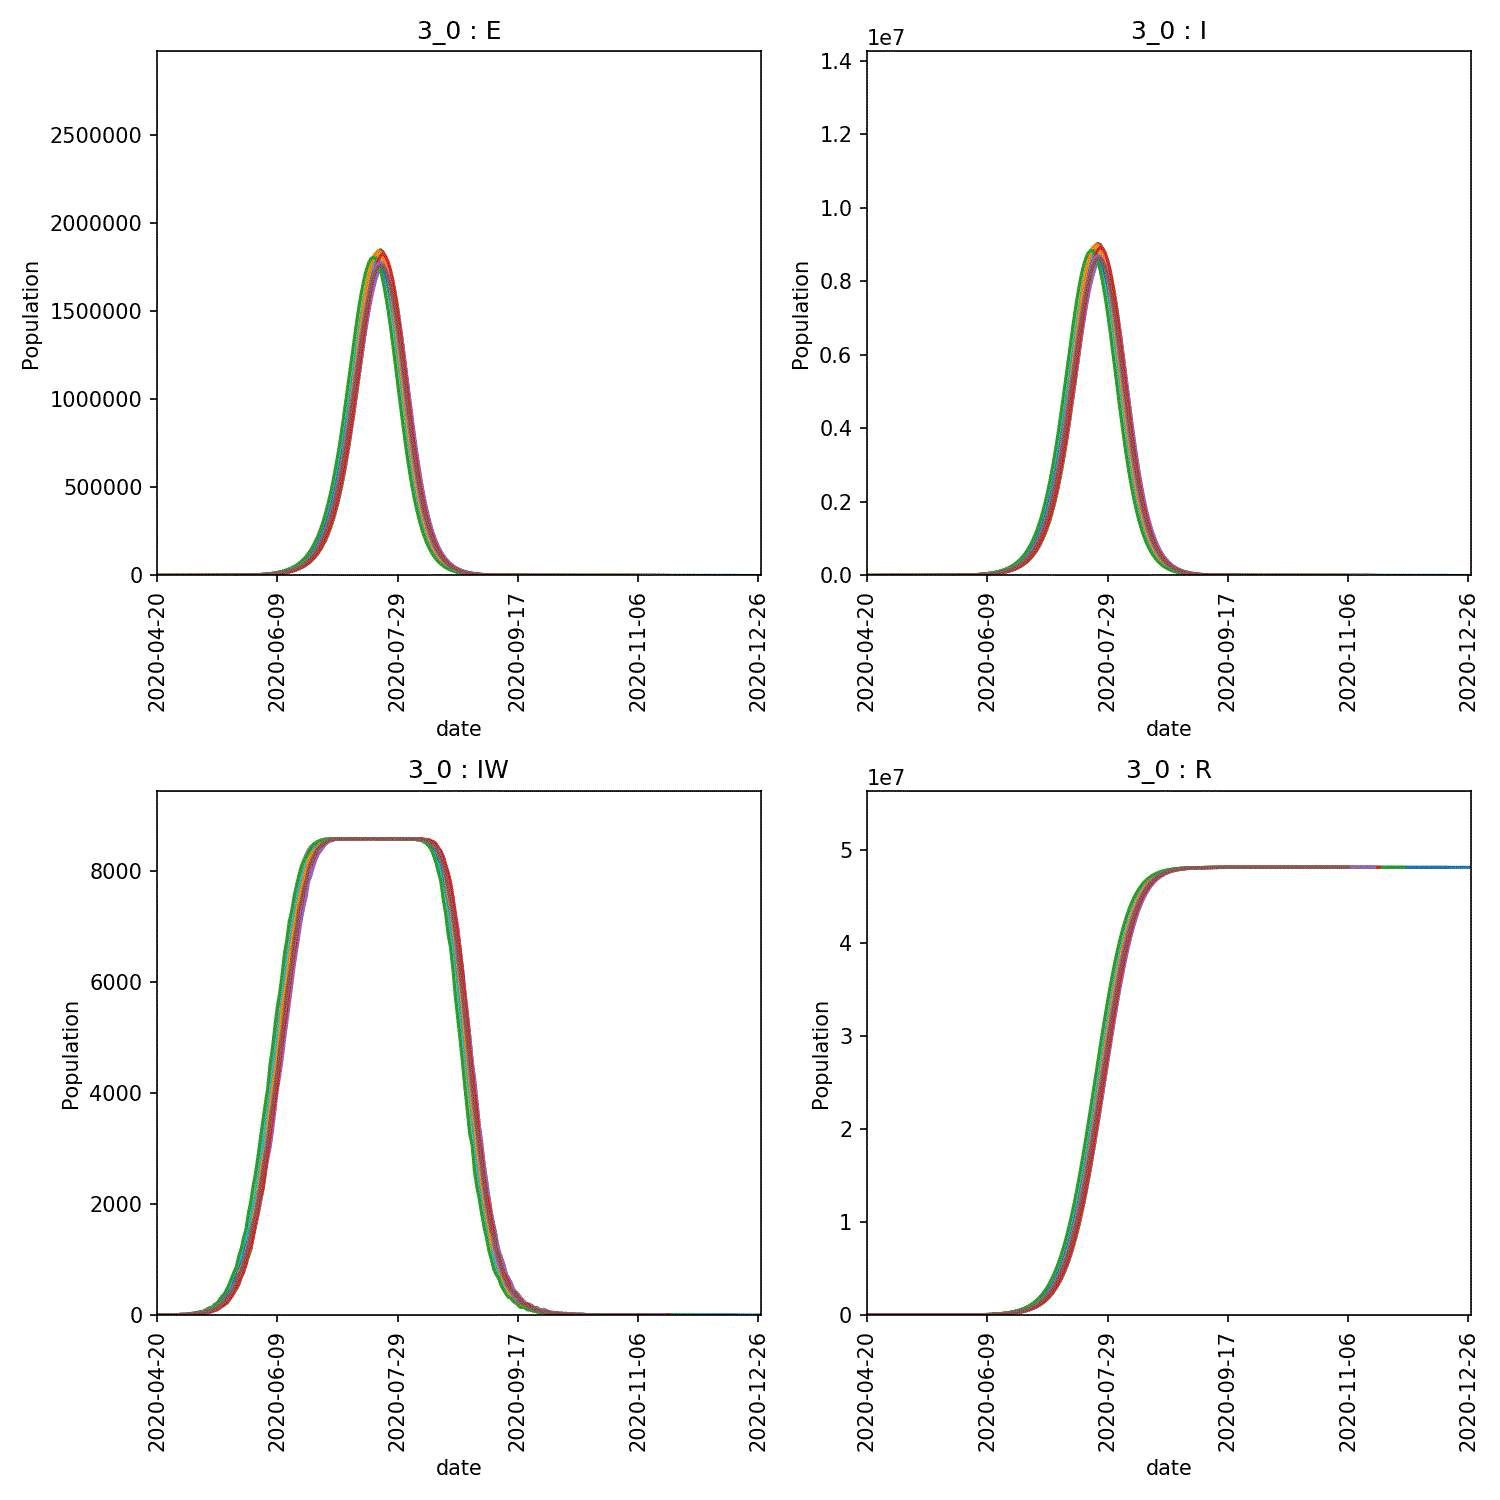
You can then produce graphs and animations using;
metawards-plot -i output/results.csv.bz2 --format jpg --dpi 150
metawards-plot --animate output/overview*.jpg
The resulting animation of the overview plots is shown below.